ネットに情報が全然なかったので手探りで実装しました、なので他にもっといいやり方があると思います,,,
UITabBarControllerの追加
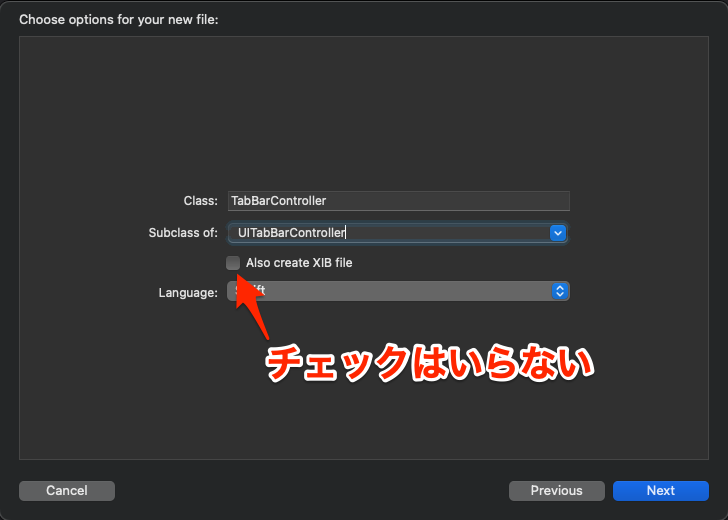
Command + N で新規ファイル追加画面を開き、SubclassをUITabBarControllerにしてファイルを追加する & SceneDelegate.swiftのRootViewをTabBarControllerにしておきましょう。
import UIKit

class SceneDelegate: UIResponder, UIWindowSceneDelegate {

    var window: UIWindow?

    func scene(_ scene: UIScene, willConnectTo session: UISceneSession, options connectionOptions: UIScene.ConnectionOptions) {
        // 追記 -----ここから
        window = UIWindow(windowScene: scene as! UIWindowScene)
        window?.makeKeyAndVisible()
        let tabBarController = TabBarController()
        window?.rootViewController = tabBarController
        // 追記 -----ここまで
    }

    func sceneDidDisconnect(_ scene: UIScene) {

    }

    func sceneDidBecomeActive(_ scene: UIScene) {

    }

    func sceneWillResignActive(_ scene: UIScene) {

    }

    func sceneWillEnterForeground(_ scene: UIScene) {

    }

    func sceneDidEnterBackground(_ scene: UIScene) {

    }

}
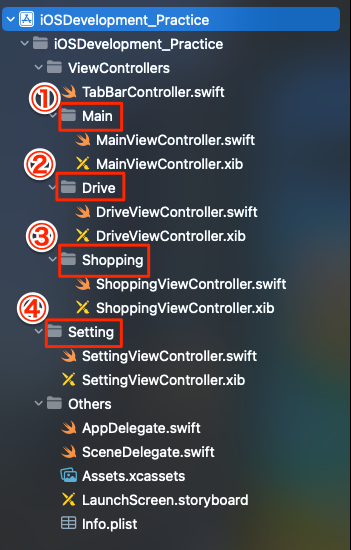
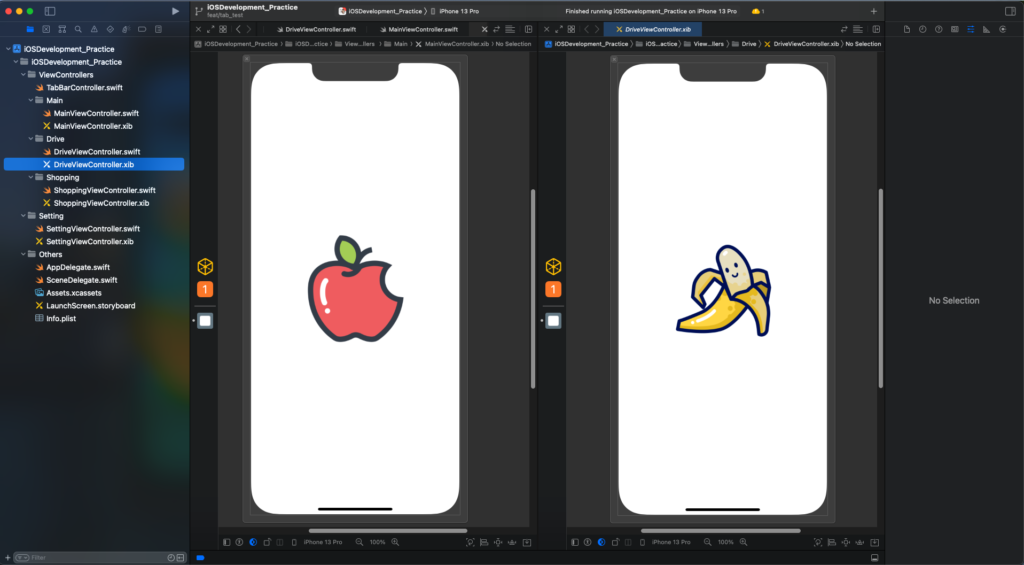
タブの数分ViewController.swiftファイルを追加する
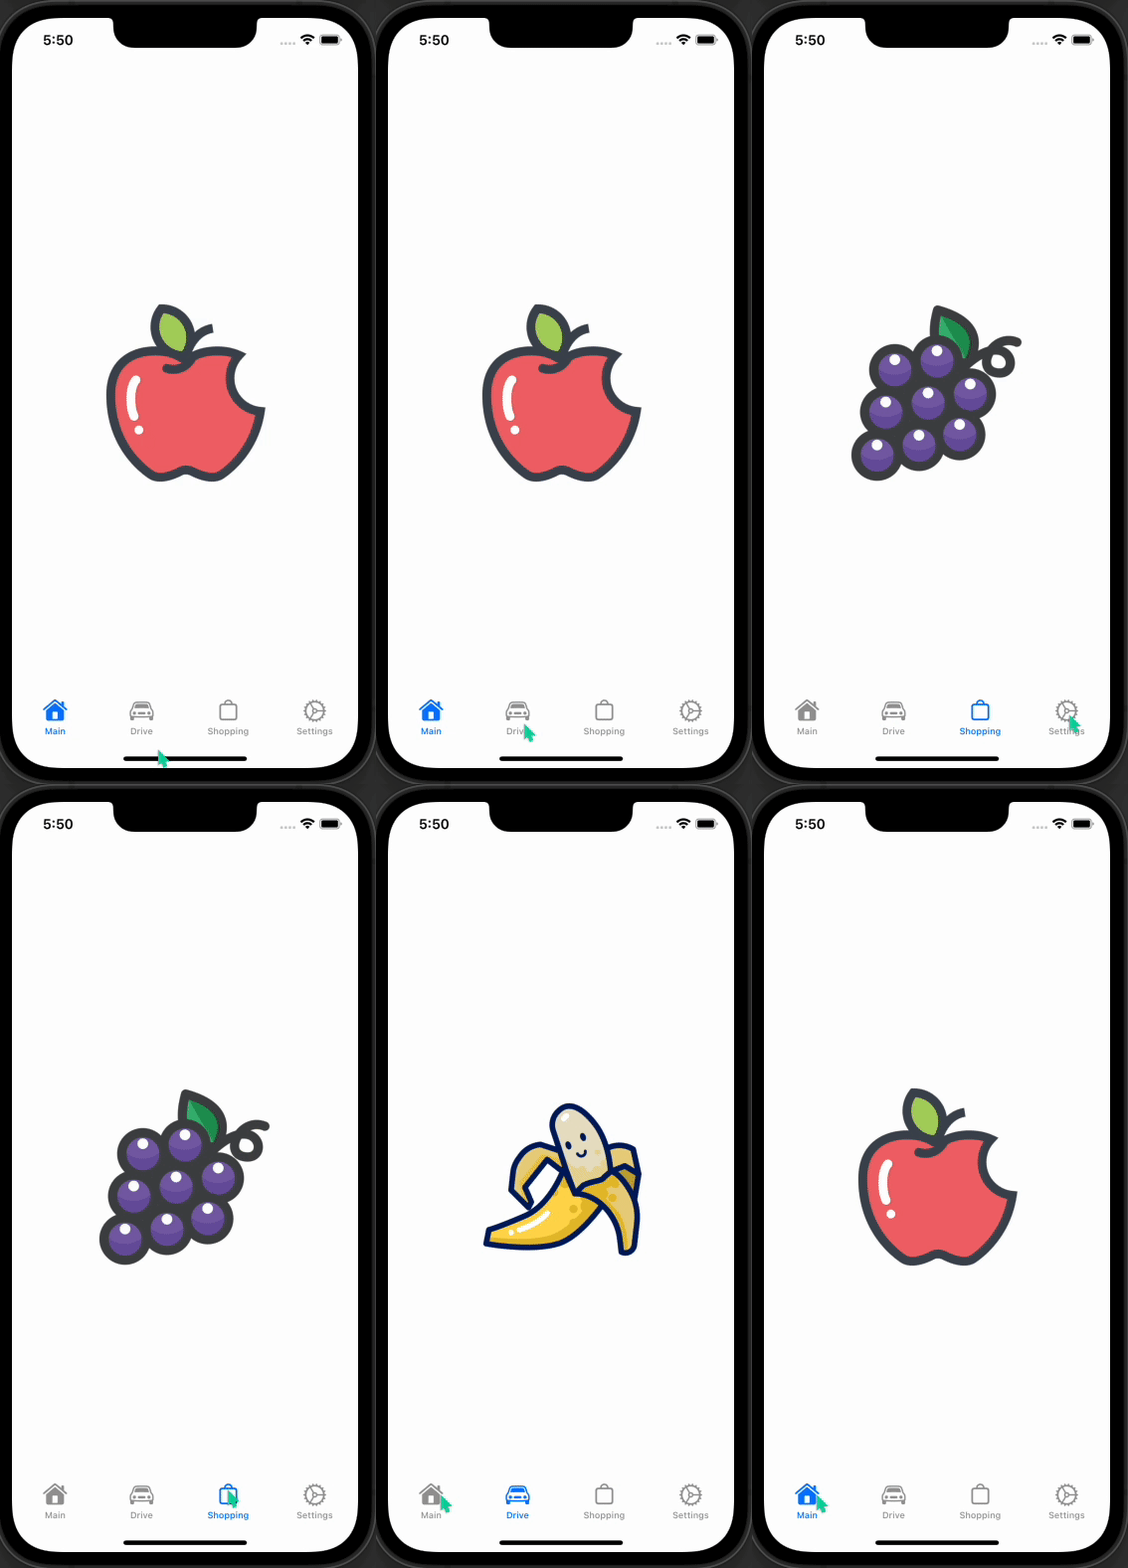
Tabの切り替えがわかりやすいようにLabelとかImageを入れておきましょう
TabBarControllerで各Tabの詳細を設定する
import UIKit

class TabBarController: UITabBarController {

    override func viewDidLoad() {
        super.viewDidLoad()
        setupEachTabView()
    }

    // 各Tabのタイトル、アイコン画像を設定する
    private func setupEachTabView() {
        let mainViewController = MainViewController(nibName: "MainViewController", bundle: nil)
        let mainTabItem = UITabBarItem(title: "Main", image: UIImage(systemName: "house.fill"), tag: 1)
        mainViewController.tabBarItem = mainTabItem

        let driveViewController = DriveViewController(nibName: "DriveViewController", bundle: nil)
        let driveTabItem = UITabBarItem(title: "Drive", image: UIImage(systemName: "car"), tag: 2)
        driveViewController.tabBarItem = driveTabItem

        let shoppingViewController = ShoppingViewController(nibName: "ShoppingViewController", bundle: nil)
        let shoppingTabItem = UITabBarItem(title: "Shopping", image: UIImage(systemName: "bag"), tag: 3)
        shoppingViewController.tabBarItem = shoppingTabItem

        let settingViewController = SettingViewController(nibName: "SettingViewController", bundle: nil)
        let settingTabItem = UITabBarItem(title: "Settings", image: UIImage(systemName: "gear"), tag: 4)
        settingViewController.tabBarItem = settingTabItem

        self.viewControllers = [mainViewController, driveViewController, shoppingViewController, settingViewController]
    }

}
まとめ (るほどでもない)

Storyboardと違って若干初期設定がめんどくさい気がしました、まあ慣れれば簡単に出来そうな感じではありますが。
そもそもXib開発の環境設定が分からないという方はこちらの記事を参考にしてください。
 Xibファイルを使った開発(Storyboard使用無し)