プロパティオブザーバとは
格納型プロパティ(Stored Property)の値が更新される際、それをトリガーとしてあるブロックを実行させることができる仕組み。
初見ではなるほど分からん状態に陥りそうな説明、、、
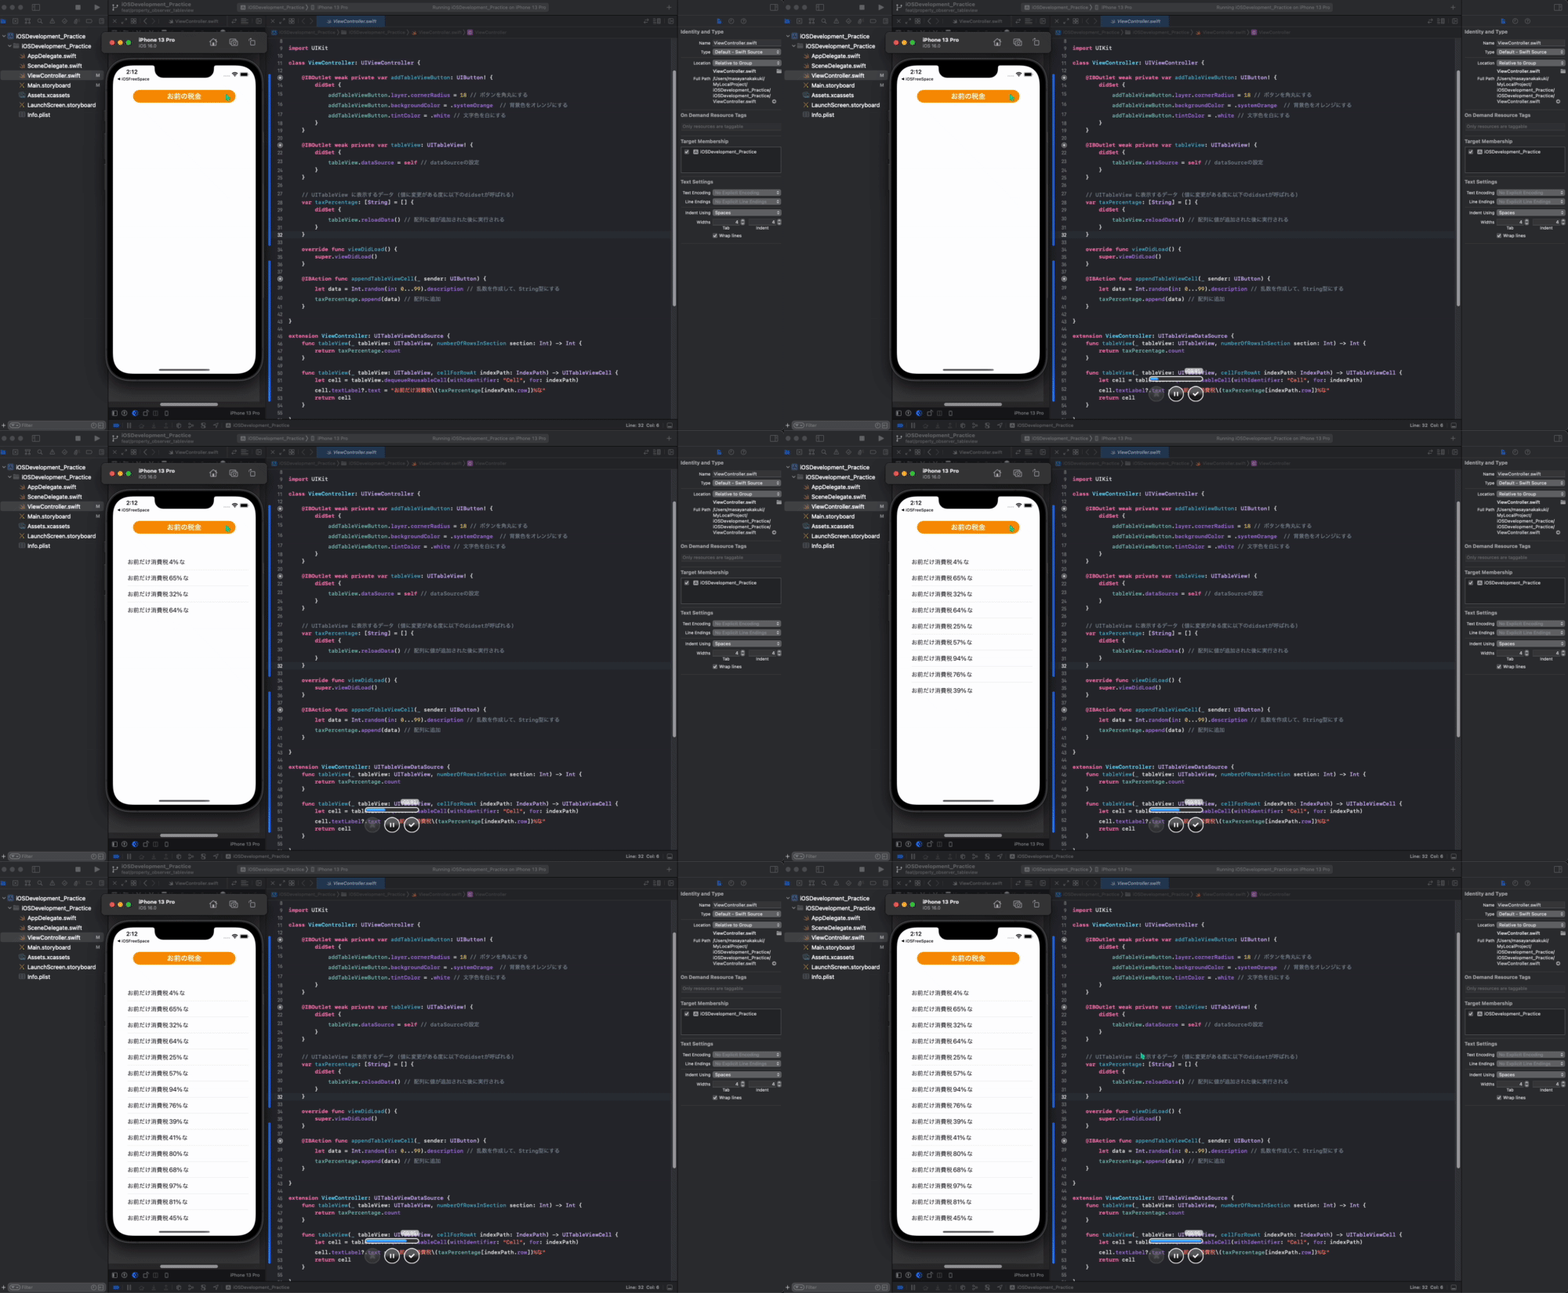
百聞は一見にしかずということで実際にプロパティオブザーバを使って簡単なTableViewを実装してみましょう。

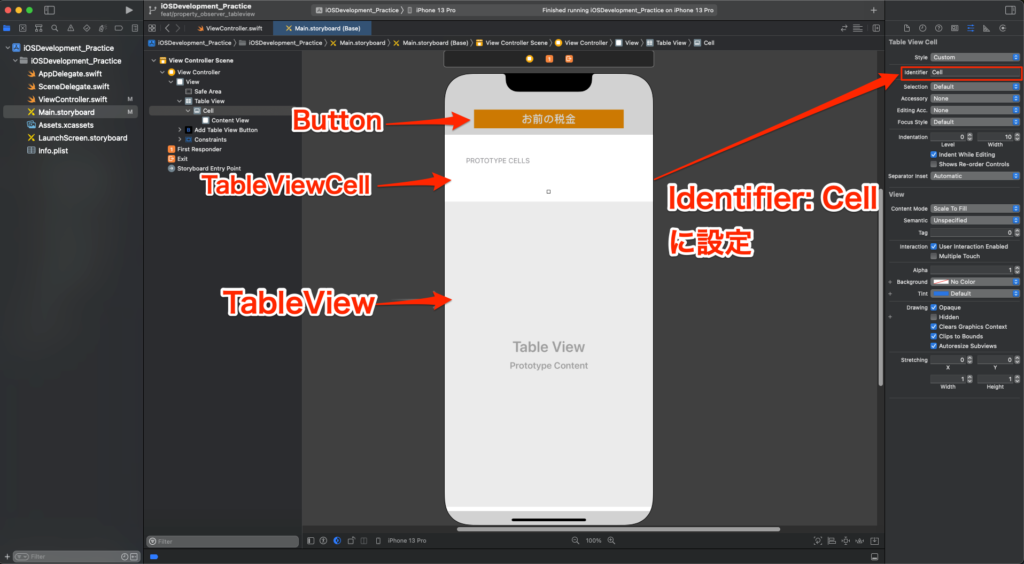
Storyboard

今回はボタンが押される度にセルを追加していこうと思います。
コード記述
didSet というものがプロパティオブザーバの概念となるものです (willSetというものもある)
ボタンが押されるごとに配列に値を追加する、配列が値の変化を検知してdidSet内の処理を実行する ( tableView.reloadData() ) という流れになります。
import UIKit

class ViewController: UIViewController {

    @IBOutlet weak private var addTableViewButton: UIButton! {
        didSet {
            addTableViewButton.layer.cornerRadius = 18 // ボタンを角丸にする
            addTableViewButton.backgroundColor = .systemOrange  // 背景色をオレンジにする
            addTableViewButton.tintColor = .white // 文字色を白にする
        }
    }

    @IBOutlet weak private var tableView: UITableView! {
        didSet {
            tableView.dataSource = self // dataSourceの設定
        }
    }

    // UITableView に表示するデータ (値に変更がある度に以下のdidsetが呼ばれる)
    var taxPercentage: [String] = [] {
        didSet {
            tableView.reloadData() // 配列に値が追加された後に実行される
        }
    }

    override func viewDidLoad() {
        super.viewDidLoad()
    }

    @IBAction func appendTableViewCell(_ sender: UIButton) {
        let data = Int.random(in: 0...99).description // 乱数を作成して、String型にする
        taxPercentage.append(data) // 配列に追加
    }

}

extension ViewController: UITableViewDataSource {
    func tableView(_ tableView: UITableView, numberOfRowsInSection section: Int) -> Int {
        return taxPercentage.count
    }

    func tableView(_ tableView: UITableView, cellForRowAt indexPath: IndexPath) -> UITableViewCell {
        let cell = tableView.dequeueReusableCell(withIdentifier: "Cell", for: indexPath)
        cell.textLabel?.text = "お前だけ消費税\(taxPercentage[indexPath.row])%な"
        return cell
    }

}
