RxSwift is a popular reactive programming framework that provides a convenient way to handle asynchronous events and data streams in iOS apps. The Model-View-ViewModel (MVVM) architecture is also a widely used design pattern in iOS app development, as it separates the app’s UI and business logic into distinct layers, making the code more manageable and testable. In this blog post, we will explore how to use RxSwift with MVVM architecture in a SwiftUI app, by building a simple app that displays a list of photos from an API.
Defining the Model
The first step in building the app is to define the data model. In our case, we will be fetching a list of photos from an API, so we need to define a Photo struct that represents each photo. Open the ContentView.swift file and add the following code:
struct Photo: Decodable, Identifiable {
    let id: Int
    let title: String
    let thumbnailUrl: String
}
This code defines a Photo struct that conforms to the Decodable protocol, allowing us to parse the JSON response from the API. The Identifiable protocol is also implemented, which requires the id property to be unique for each photo.
Setting up the ViewModel
The next step is to define the ViewModel, which will contain the business logic and interact with the Model to fetch and process data. Create a new file called PhotoViewModel.swift and add the following code:
import RxSwift
import RxCocoa
import SwiftUI

class PhotoViewModel: ObservableObject {
    private let disposeBag = DisposeBag()

    @Published var photos: [Photo] = []

    func fetchPhotos() {
        let url = URL(string: "https://jsonplaceholder.typicode.com/photos")!
        let request = URLRequest(url: url)
        URLSession.shared.rx.response(request: request)
            .map { response, data in
                try JSONDecoder().decode([Photo].self, from: data)
            }
            .observe(on: MainScheduler.instance)
            .subscribe(onNext: { [weak self] photos in
                self?.photos = photos
            })
            .disposed(by: disposeBag)
    }
}
This code defines a PhotoViewModel class that conforms to the ObservableObject protocol, allowing us to use it as the ViewModel in our SwiftUI views. The @Published property wrapper is used to expose the photos array to the view, so that changes to it will automatically trigger updates to the UI.
The fetchPhotos() method uses RxSwift to fetch the list of photos from the API. It creates a URLRequest with the API URL and uses URLSession.shared.rx.response to send the request and receive the response as an Observable. The map operator is used to decode the JSON response into an array of Photo objects. The `observe(on)operator is used to switch the execution to the main thread, as UI updates must always happen on the main thread. Finally, thesubscribe(onNext:)method is called to subscribe to the Observable and update thephotosarray with the received data. Thedisposed(by:)` method is called to dispose of the subscription when the ViewModel is deallocated.
Creating the View
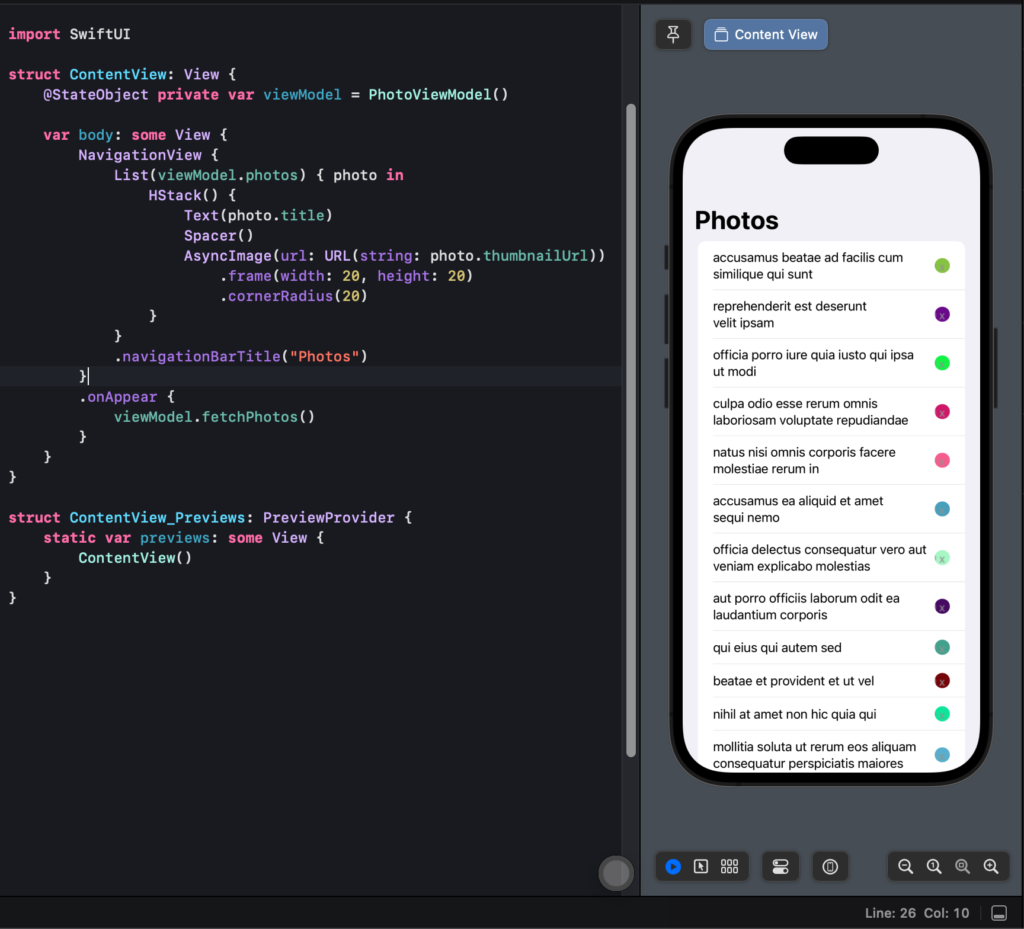
Now that we have the ViewModel set up, we can create the SwiftUI view that will display the list of photos. Open the ContentView.swift file and replace the existing code with the following:
import SwiftUI

struct ContentView: View {
    @StateObject private var viewModel = PhotoViewModel()

    var body: some View {
        NavigationView {
            List(viewModel.photos) { photo in
                HStack() {
                    Text(photo.title)
                    Spacer()
                    AsyncImage(url: URL(string: photo.thumbnailUrl))
                        .frame(width: 20, height: 20)
                        .cornerRadius(20)
                }
            }
            .navigationBarTitle("Photos")
        }
        .onAppear {
            viewModel.fetchPhotos()
        }
    }
}

struct ContentView_Previews: PreviewProvider {
    static var previews: some View {
        ContentView()
    }
}
This code defines a ContentView struct that displays a list of photos in a List view. The @StateObject property wrapper is used to create an instance of the PhotoViewModel and hold a reference to it in the view’s state. The List view displays each photo in a HStack with the title and thumbnail, and uses the AsyncImage view from the SwiftUIX library to asynchronously load the thumbnail image from the URL.
The navigationBarTitle modifier sets the title of the navigation bar to “Photos”. The onAppear modifier calls the fetchPhotos() method of the ViewModel when the view appears, so that the list of photos is fetched from the API and displayed in the UI.

Conclusion
In this blog post, we explored how to use RxSwift with MVVM architecture in a SwiftUI app, by building a simple app that displays a list of photos from an API. We defined the data model, created the ViewModel with RxSwift, and built the SwiftUI view that displays the list of photos. By using RxSwift with MVVM, we can make our code more manageable and testable, and handle asynchronous events and data streams in a more intuitive and reactive way.

