今回はFirebaseを使用してGoogleアカウントでのサインイン実装を解説します。
難しそうに見えて結構簡単に実装出来るのでぜひ参考にしてみてください。
Contents 非表示
開発環境
今回は以下の環境で実装を行なっています。
| Mac OS | Ventura 13.0 |
| Xcode バージョン | 14.0.1 |
| Swift バージョン | 5.7 |
Firebaseの登録 & 設定
プロジェクト作成が完了したら以下画像のような画面になるので “iOS” を選択する

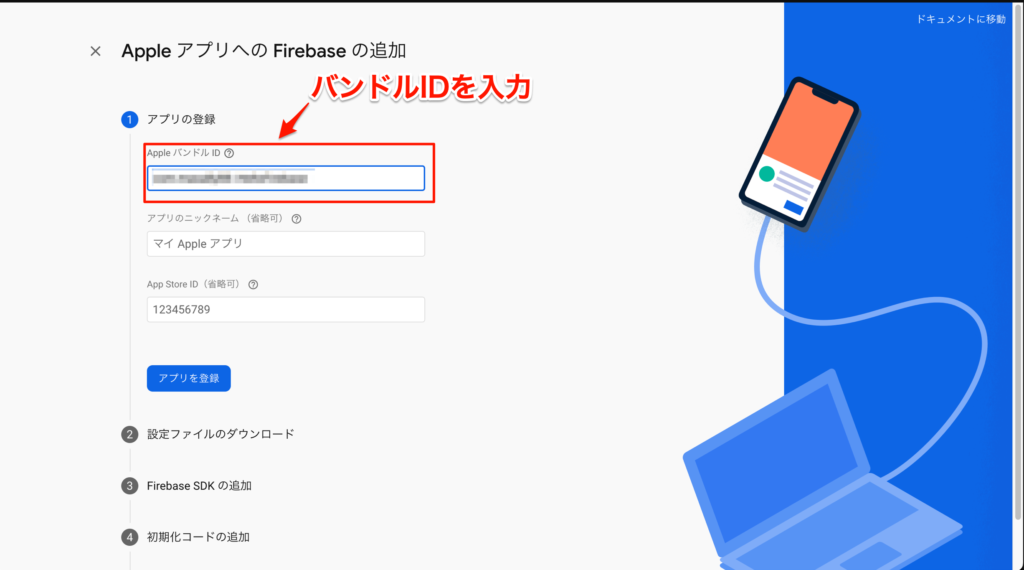
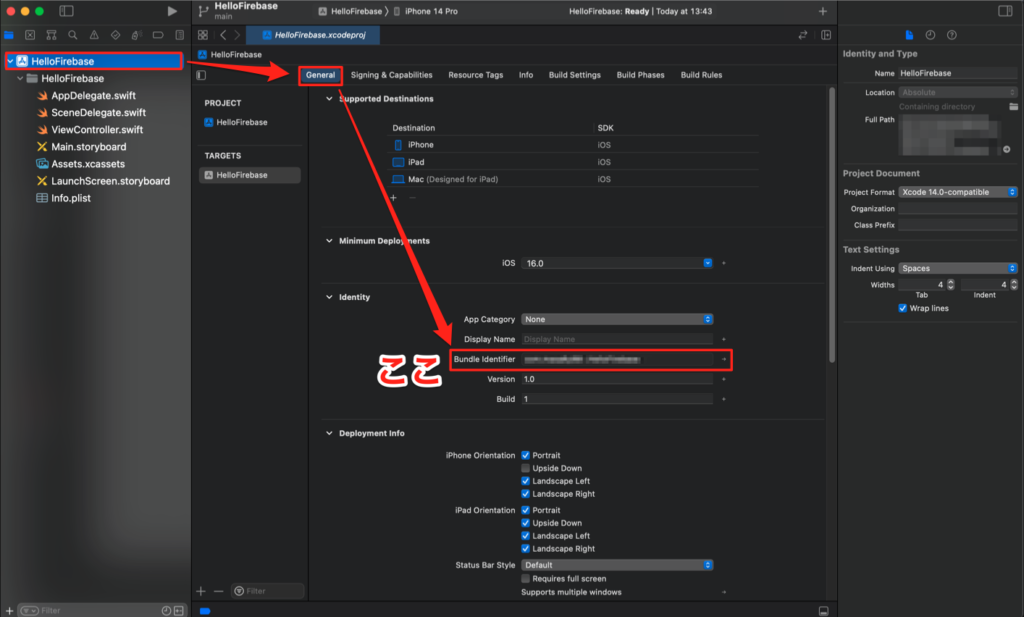
入力が完了したら【アプリを登録】を選択
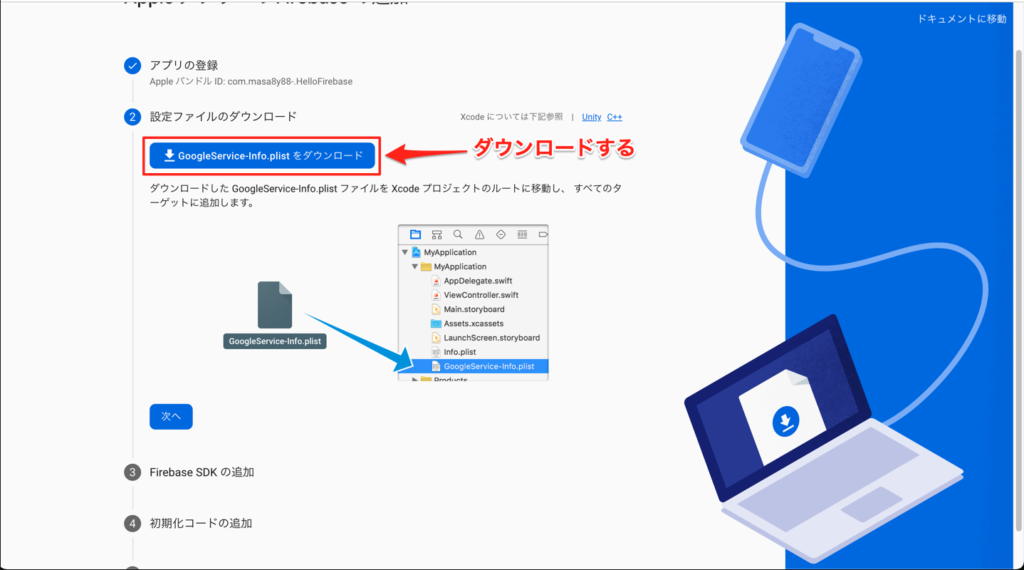
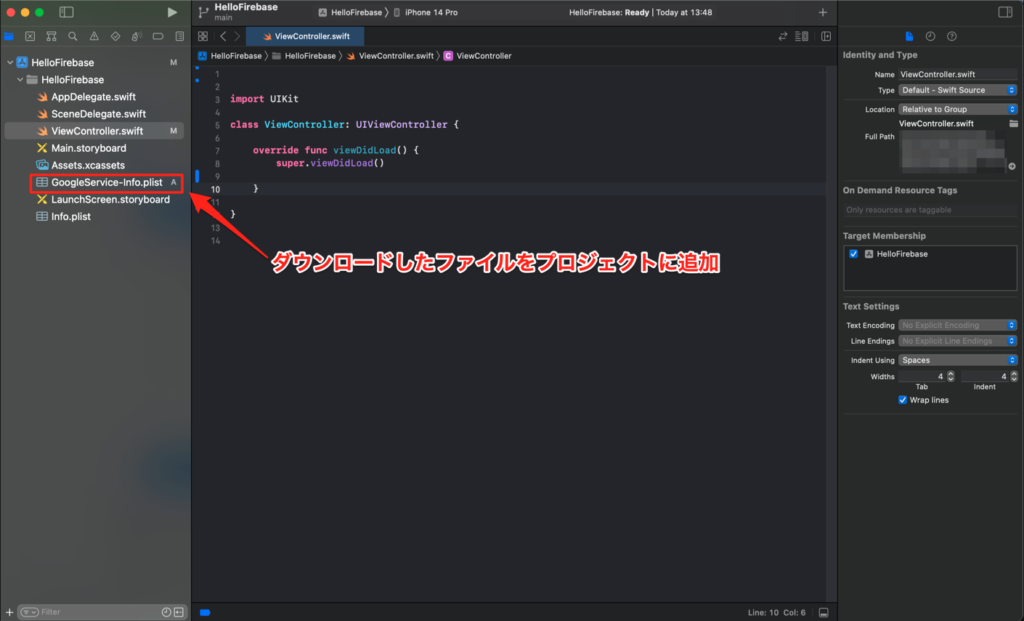
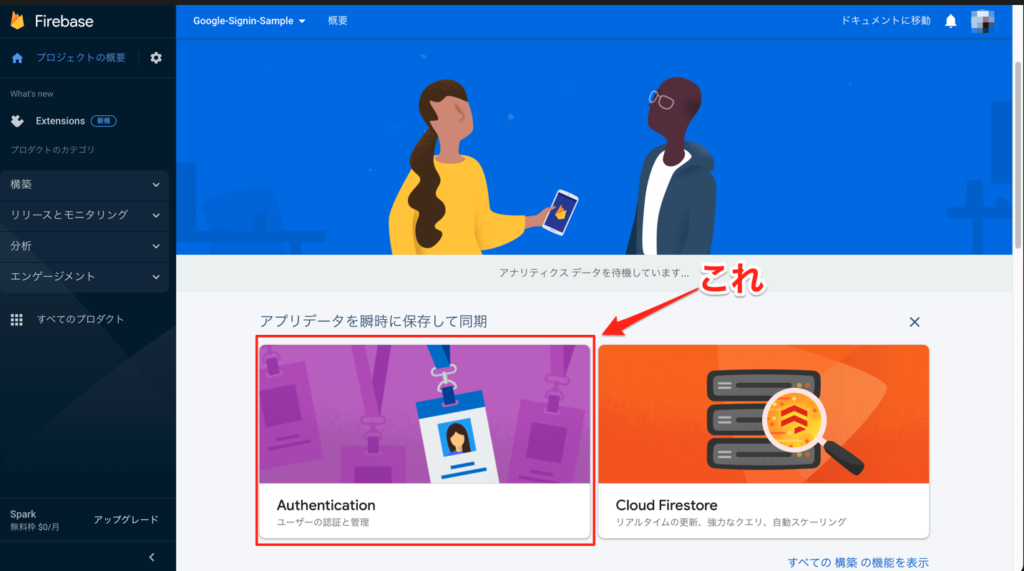
Firebaseの次の手順、【Firebase SDKの追加】と【初期化コードの追加】は無視してそのまま最後の【コンソールに進む】を選択してOKです。
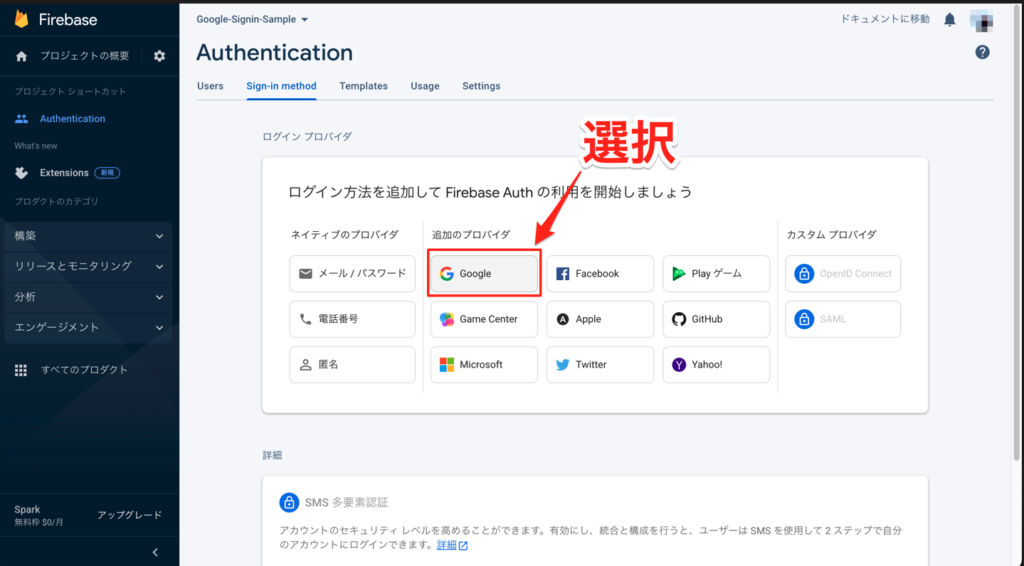
ログイン方法画面で、【Google】を選択
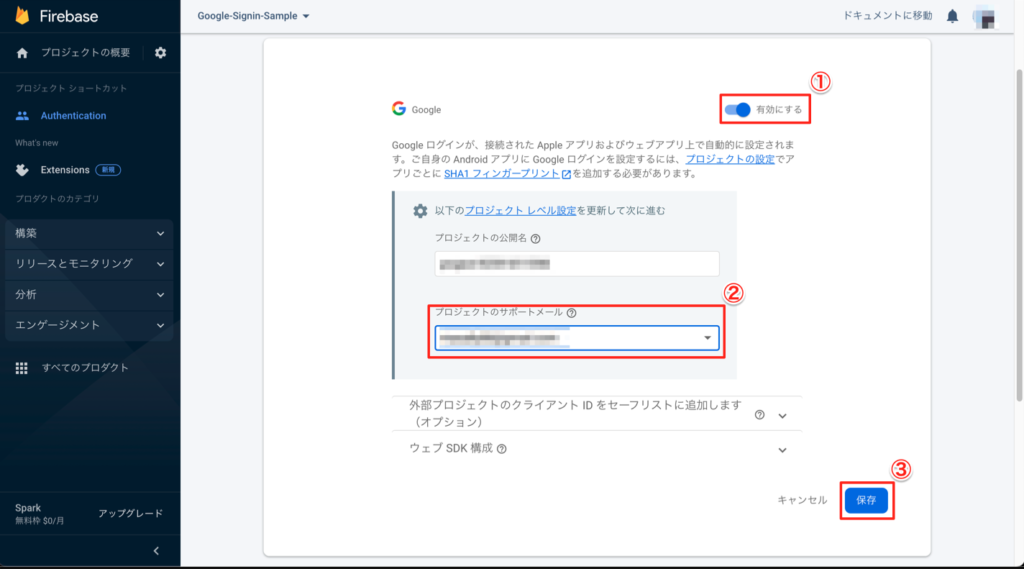
プロジェクトのサポートメール項目を入力して【保存】を押したらFirebaseの設定は完了です。
プロジェクトの編集 & 実装
Firebaseのインストール
Podfileを作成して以下2行を追加した後にインストールをする (インストール後は白いプロジェクトファイルから開き直してください)
pod 'Firebase/Auth'
pod 'GoogleSignIn'
URLスキーマ設定
REVERSED_CLIENT_IDのValueをコピペする
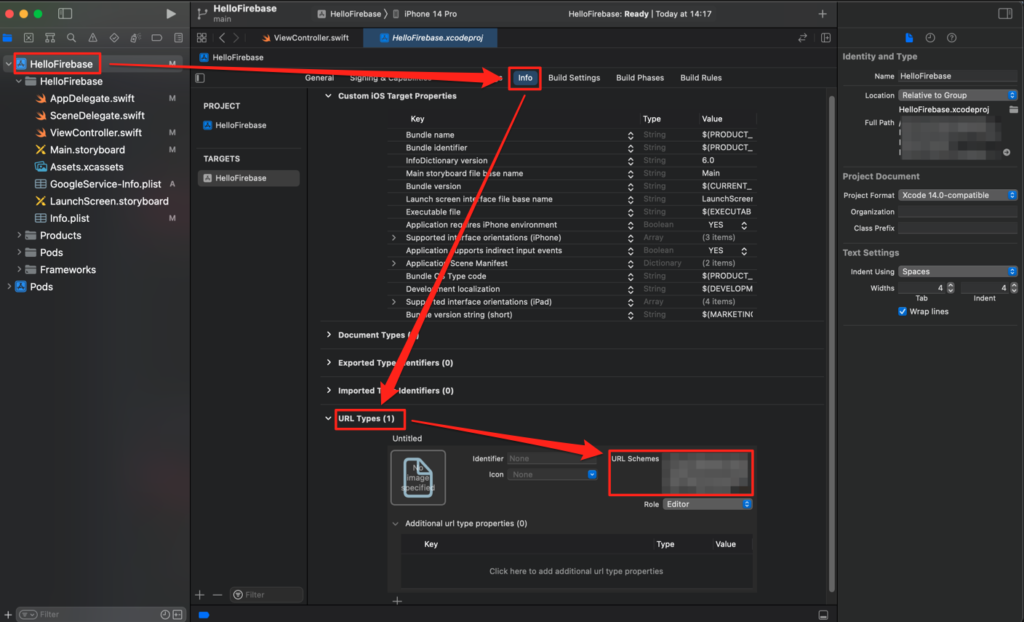
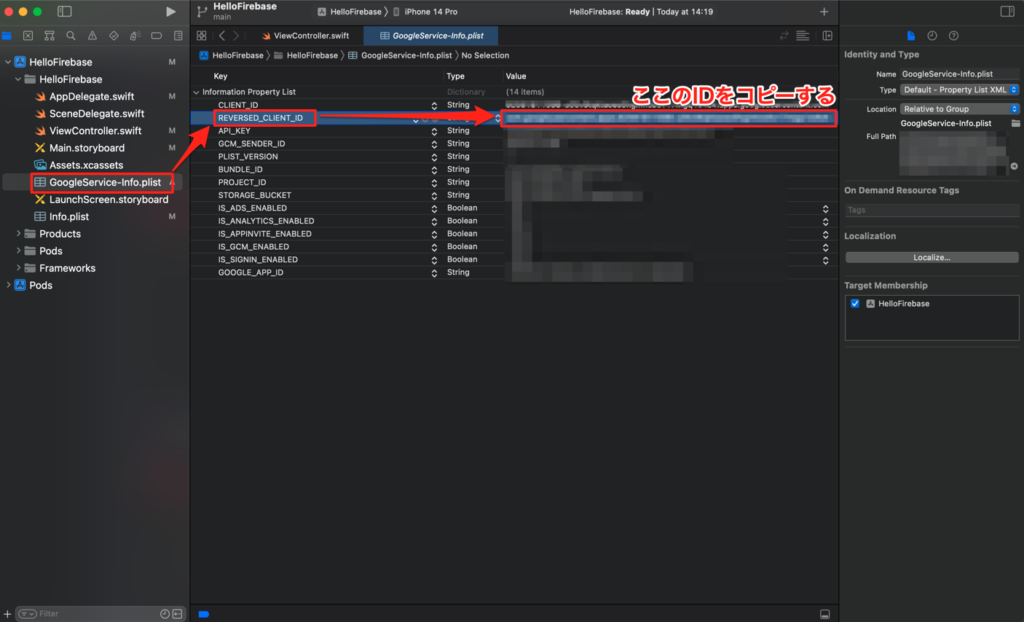
AppDelegate.swiftの編集
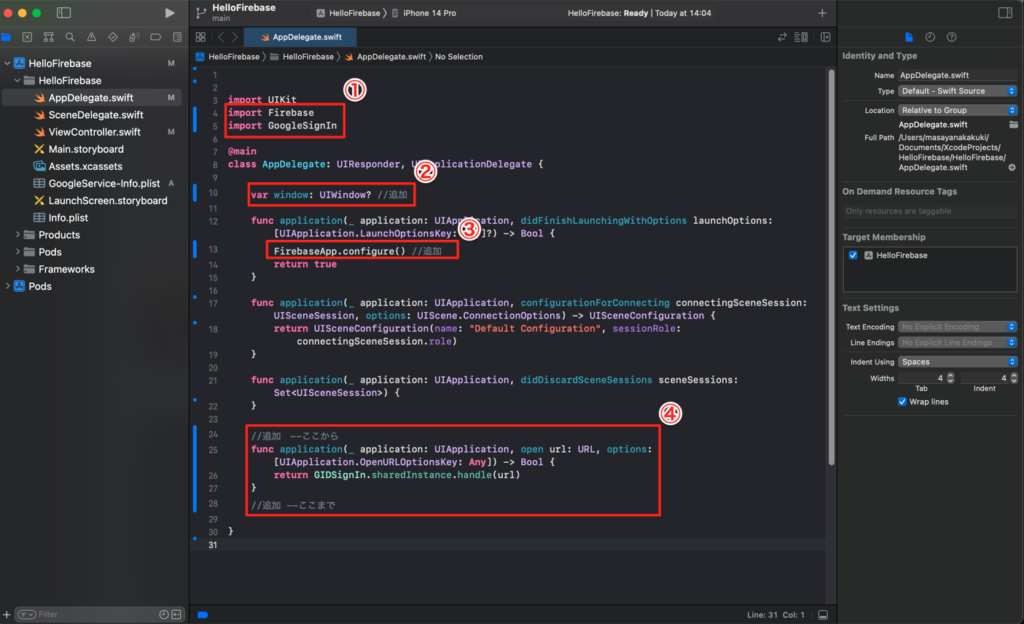
AppDelegate.swiftに以下のように編集 (SceneDelegate.swiftはノータッチでOK)
import UIKit
import Firebase
import GoogleSignIn

@main
class AppDelegate: UIResponder, UIApplicationDelegate {

    var window: UIWindow? //追加

    func application(_ application: UIApplication, didFinishLaunchingWithOptions launchOptions: [UIApplication.LaunchOptionsKey: Any]?) -> Bool {
        FirebaseApp.configure() //追加
        return true
    }

    func application(_ application: UIApplication, configurationForConnecting connectingSceneSession: UISceneSession, options: UIScene.ConnectionOptions) -> UISceneConfiguration {
        return UISceneConfiguration(name: "Default Configuration", sessionRole: connectingSceneSession.role)
    }

    func application(_ application: UIApplication, didDiscardSceneSessions sceneSessions: Set<UISceneSession>) {
    }

    //追加 --ここから
    func application(_ application: UIApplication, open url: URL, options: [UIApplication.OpenURLOptionsKey: Any]) -> Bool {
        return GIDSignIn.sharedInstance.handle(url)
    }
    //追加 --ここまで

}
Storyboardの編集
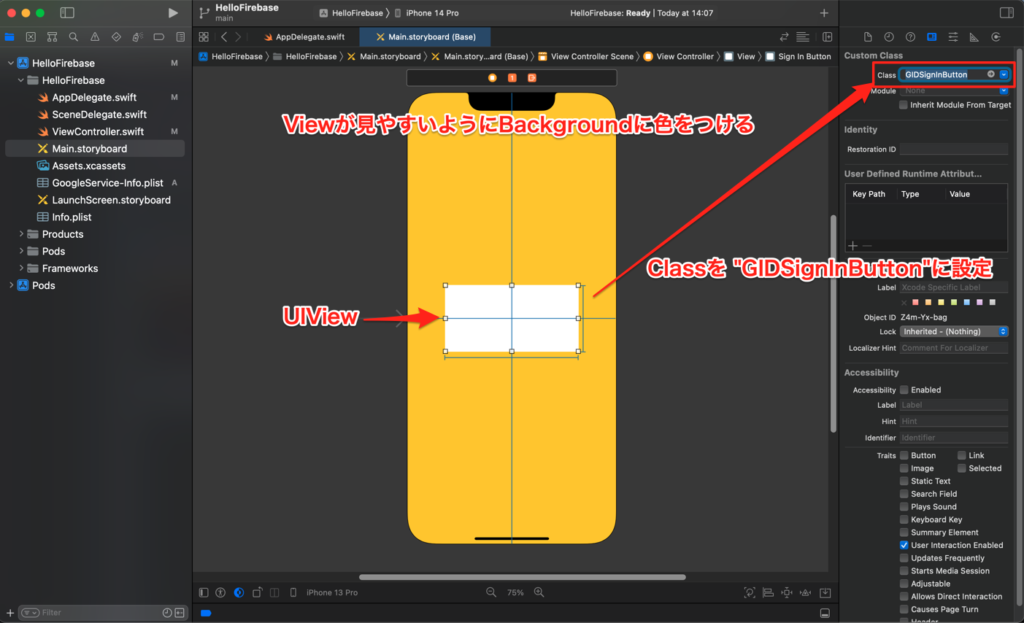
UIViewをアクション接続する
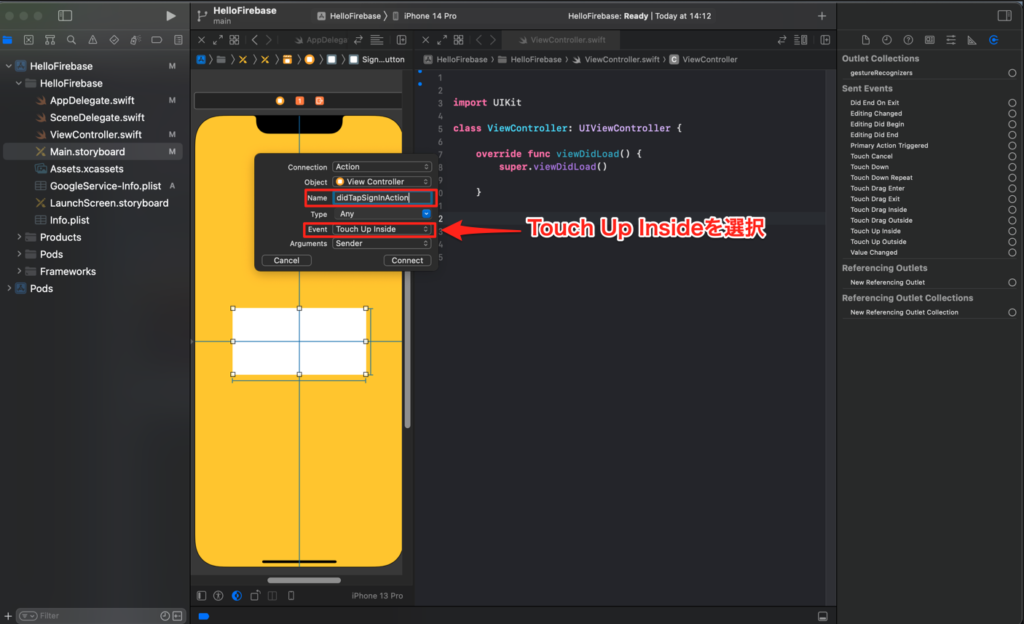
コードの記述
ViewController.swiftを以下のように編集
import UIKit
import Firebase
import GoogleSignIn

class ViewController: UIViewController {

    override func viewDidLoad() {
        super.viewDidLoad()
    }

    //Viewがタップされた時に認証ページに移行する
    @IBAction func didTapSignInAction(_ sender: Any) {
        auth()
    }

    private func auth() {
        guard let clientID = FirebaseApp.app()?.options.clientID else { return }
        let config = GIDConfiguration(clientID: clientID)

        GIDSignIn.sharedInstance.signIn(with: config, presenting: self) { [unowned self] user, error in
            if let error = error {
                print("GIDSignInError: \(error.localizedDescription)")
                return
            }

            guard let authentication = user?.authentication,
                  let idToken = authentication.idToken else { return }

            let credential = GoogleAuthProvider.credential(withIDToken: idToken, accessToken: authentication.accessToken)
            self.login(credential: credential)
        }
    }
    private func login(credential: AuthCredential) {
        print("Login Successful!")
    }

}
ビルドをして確認
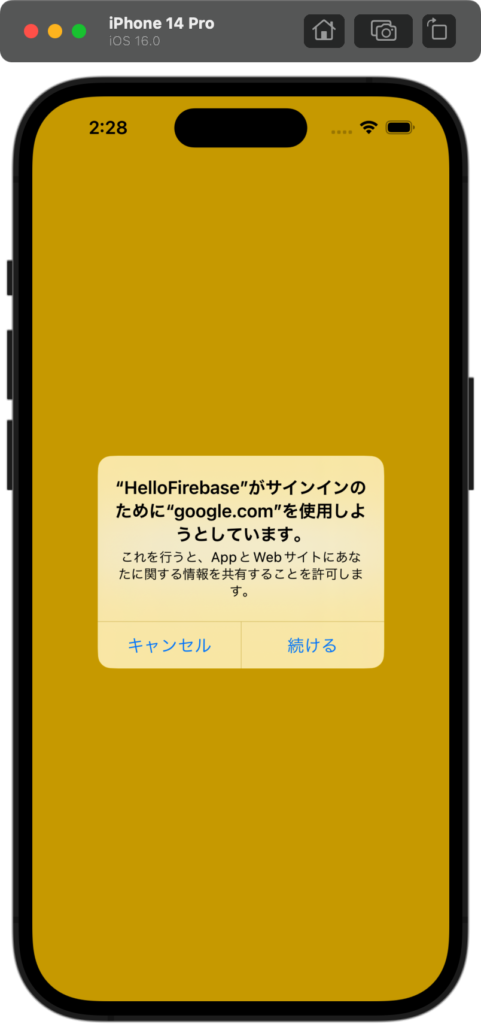
ビルドをして挙動を確認してみましょう、Viewをタップした時に認証ページへ移行出来ればOKです!
まとめ

今回は以上です、Firebaseはバックエンド周りの知識が少なくても簡単に使える (はず)なのでぜひ色々と使って試してみてください!
☆参考文献
◎今日の格言
ー Albert Einstein

The true sign of intelligence is not knowledge but imagination
(真の知性とは単なる知識量ではなくイマジネーション力である)
