Contents 非表示
Introduction
In this blog post, we will walk through the process of building a simple counter app using RxSwift and RxCocoa. RxSwift is a popular reactive programming framework for iOS development that allows you to handle asynchronous events and data streams in a declarative and concise manner. RxCocoa is a companion framework to RxSwift that provides reactive bindings to UI elements in UIKit, making it easy to connect user interface actions to data processing. By leveraging the power of RxSwift and RxCocoa, we can create a reactive and responsive counter app with minimal code.
Prerequisites
To follow along with this tutorial, you will need the following:
- Xcode installed on your macOS machine
- Basic understanding of Swift programming language
- Familiarity with UIKit and iOS app development concepts
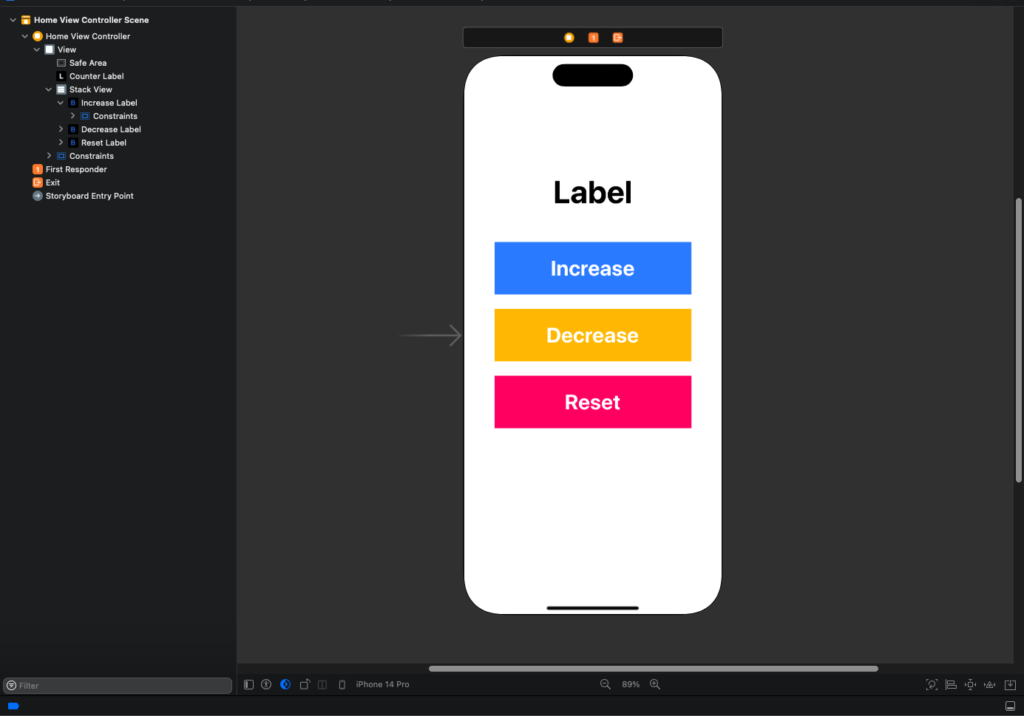
Setting up the Project: Let’s start by creating a new iOS project in Xcode using the “Single View App” template. Choose Swift as the programming language and provide a suitable name and location for your project. Once the project is created, open the main view controller’s storyboard file (Main.storyboard) and add the following UI elements:
- A UILabel to display the counter value
- Three UIButtons for increasing, decreasing, and resetting the counter

Next, create outlets for these UI elements in the view controller and connect them to the corresponding IBOutlets in the code.
Implementing the View Model:
We will now create a view model class, CounterViewModel, that will handle the business logic of our counter app. The view model will expose inputs and outputs through protocols that define the interface between the view controller and the view model. Let’s implement the view model using the following steps:
1: Create a new Swift file for the view model, and define the CounterViewModelType, CounterViewModelInputs, and CounterViewModelOutputs protocols.
protocol CounterViewModelInputs {
    // Define input subjects for increase, decrease, and reset actions
}

protocol CounterViewModelOutputs {
    // Define an output relay for the counter value
}

protocol CounterViewModelType {
    var inputs: CounterViewModelInputs { get }
    var outputs: CounterViewModelOutputs { get }
}
2: Implement the CounterViewModel class that conforms to the CounterViewModelType, CounterViewModelInputs, and CounterViewModelOutputs protocols.
class CounterViewModel: CounterViewModelType, CounterViewModelInputs, CounterViewModelOutputs {
    // Implement input subjects for increase, decrease, and reset actions
    // Implement an output relay for the counter value
    // Implement the business logic for updating the counter value based on input actions
}
3: In the CounterViewModel class, create input subjects (increase, decrease, and reset) for the actions the user can take on the counter. Also, create an output relay (counter) that represents the current value of the counter. Use RxSwift’s PublishSubject for the input subjects and BehaviorRelay for the output relay, as they provide the necessary functionality for handling input events and binding to UI elements.
class CounterViewModel: CounterViewModelType, CounterViewModelInputs, CounterViewModelOutputs {
    // Inputs
    let increase = PublishSubject<Void>()
    let decrease = PublishSubject<Void>()
    let reset = PublishSubject<Void>()

    // Outputs
    let counter = BehaviorRelay<Int>(value: 0)

    // Business logic for updating the counter value based on input actions
}
4: Implement the business logic for updating the counter value based on input actions. For example, when the user taps on the increase button, the corresponding input subject (increase) should be triggered, and the counter value should be incremented by 1. Similarly, when the user taps on the decrease button, the counter value should be decremented by 1, and when the user taps on the reset button, the counter value should be reset to 0. We can achieve this by subscribing to the input subjects and updating the counter relay accordingly.
import RxSwift
import RxCocoa

protocol CounterViewModelInputs {
    var increase: PublishSubject<Void> { get }
    var decrease: PublishSubject<Void> { get }
    var reset: PublishSubject<Void> { get }
}

protocol CounterViewModelOutputs {
    var counter: BehaviorRelay<Int> { get }
}

protocol CounterViewModelType {
    var inputs: CounterViewModelInputs { get }
    var outputs: CounterViewModelOutputs { get }
}

class CounterViewModel: CounterViewModelType, CounterViewModelInputs, CounterViewModelOutputs {

    var inputs: CounterViewModelInputs { return self }
    var outputs: CounterViewModelOutputs { return self }

    // Inputs
    let increase = PublishSubject<Void>()
    let decrease = PublishSubject<Void>()
    let reset = PublishSubject<Void>()

    // Outputs
    let counter = BehaviorRelay<Int>(value: 0)

    private let disposeBag = DisposeBag()

    init() {
        // Bind input actions to counter value
        increase
            .subscribe(onNext: { [weak self] in
                guard let self = self else { return }
                let currentValue = self.counter.value
                self.counter.accept(currentValue + 1)
            })
            .disposed(by: disposeBag)

        decrease
            .subscribe(onNext: { [weak self] in
                guard let self = self else { return }
                let currentValue = self.counter.value
                self.counter.accept(currentValue - 1)
            })
            .disposed(by: disposeBag)

        reset
            .subscribe(onNext: { [weak self] in
                guard let self = self else { return }
                self.counter.accept(0)
            })
            .disposed(by: disposeBag)
    }
}
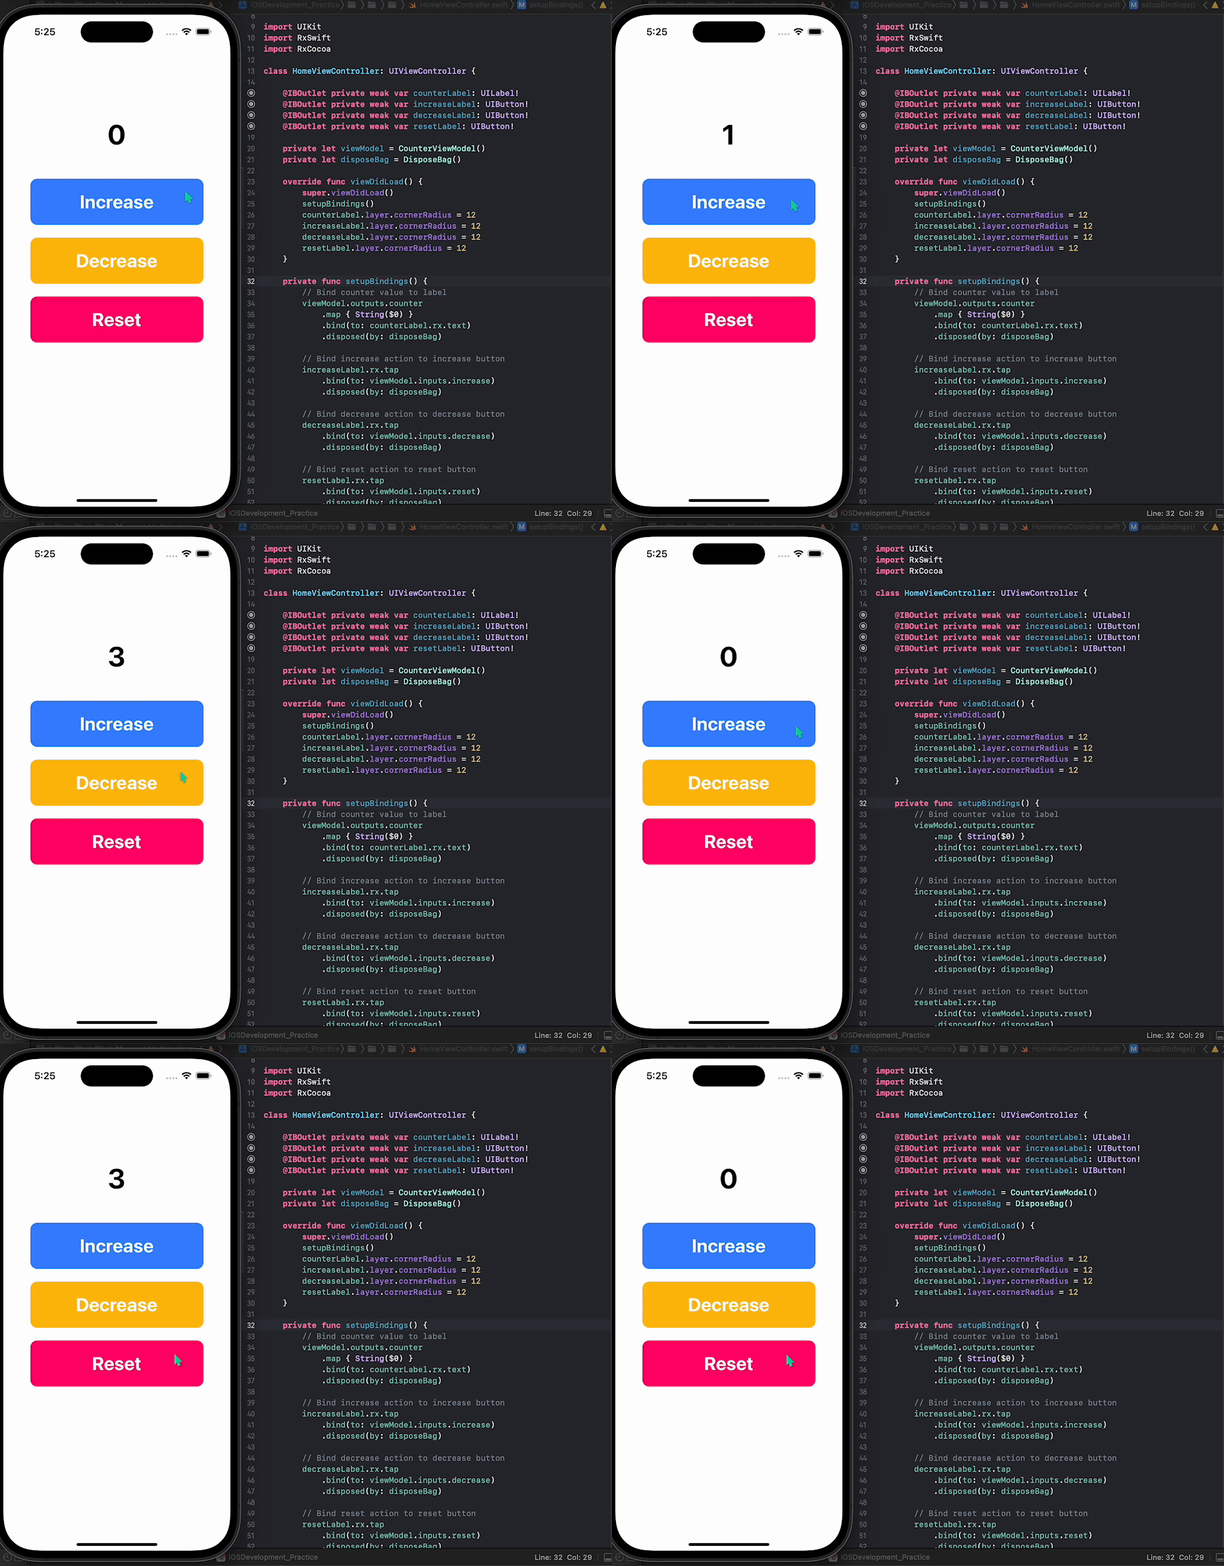
Connecting View Controller and View Model: Now that we have implemented the CounterViewModel, we can connect it to the view controller using RxSwift and RxCocoa bindings. In the viewDidLoad() method of the view controller, we can bind the UI elements to the corresponding input subjects and output relay of the view model.
import UIKit
import RxSwift
import RxCocoa

class HomeViewController: UIViewController {

    @IBOutlet private weak var counterLabel: UILabel!
    @IBOutlet private weak var increaseLabel: UIButton!
    @IBOutlet private weak var decreaseLabel: UIButton!
    @IBOutlet private weak var resetLabel: UIButton!

    private let viewModel = CounterViewModel()
    private let disposeBag = DisposeBag()

    override func viewDidLoad() {
        super.viewDidLoad()
        setupBindings()
        counterLabel.layer.cornerRadius = 12
        increaseLabel.layer.cornerRadius = 12
        decreaseLabel.layer.cornerRadius = 12
        resetLabel.layer.cornerRadius = 12
    }

    private func setupBindings() {
        // Bind counter value to label
        viewModel.outputs.counter
            .map { String($0) }
            .bind(to: counterLabel.rx.text)
            .disposed(by: disposeBag)

        // Bind increase action to increase button
        increaseLabel.rx.tap
            .bind(to: viewModel.inputs.increase)
            .disposed(by: disposeBag)

        // Bind decrease action to decrease button
        decreaseLabel.rx.tap
            .bind(to: viewModel.inputs.decrease)
            .disposed(by: disposeBag)

        // Bind reset action to reset button
        resetLabel.rx.tap
            .bind(to: viewModel.inputs.reset)
            .disposed(by: disposeBag)
    }

}
In the above code, we use RxSwift’s rx.tap to create observable sequences for the tap events of the buttons, and then bind them to the corresponding input subjects of the view model. We also bind the counter relay of the view model to the text property of the counterLabel, so that the label text gets automatically updated whenever the counter value changes.

Conclusion
In this blog post, we learned how to build a simple counter app using RxSwift and RxCocoa. We implemented a view model that handles the business logic of the counter app and exposed inputs and outputs through protocols. We then connected the view controller and the view model using RxSwift and RxCocoa bindings, allowing for reactive and responsive behavior. By leveraging the power of RxSwift and RxCocoa, we can create robust and efficient apps with clean and maintainable code.

