
今回は実務で使用する頻度が高いXibファイルを使った開発方法を紹介します。
開発手順
ViewControllerとStoryboardの削除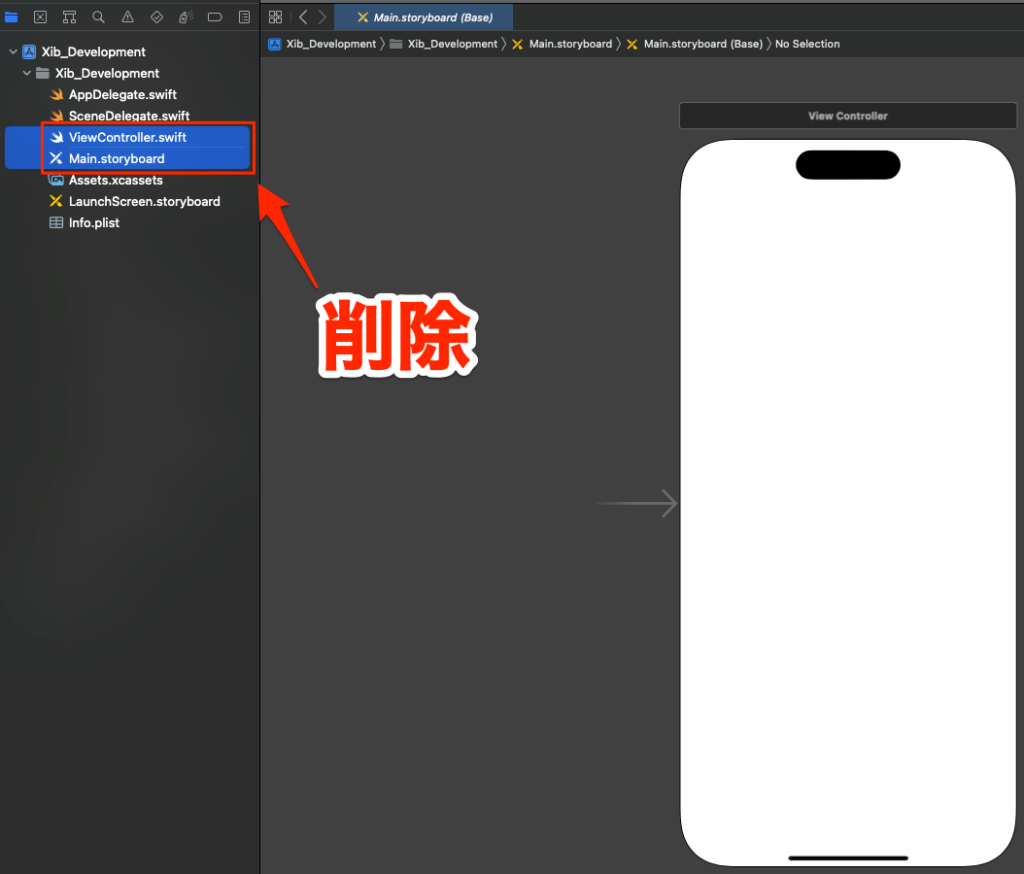
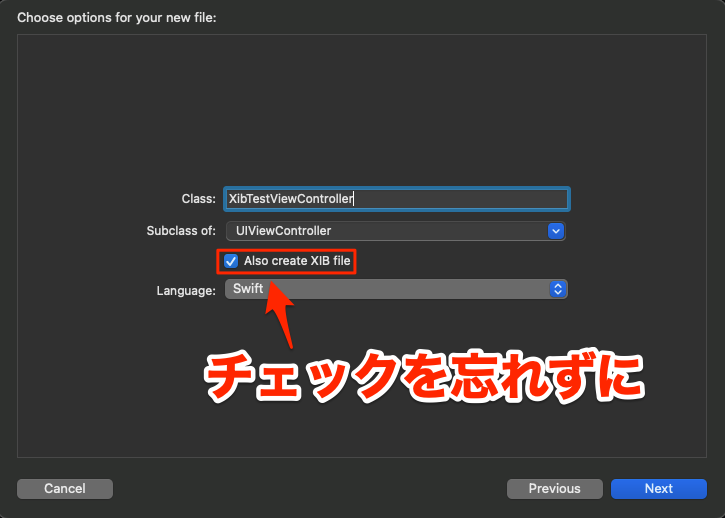
新規ファイルの追加
Command + Nで新規ファイル追加画面を開く、CocoaTouchClassを選択してXibTestViewControllerと名づける
Info.plistの編集
【Main Storyboard file base name】と【Storyboard Name】を削除


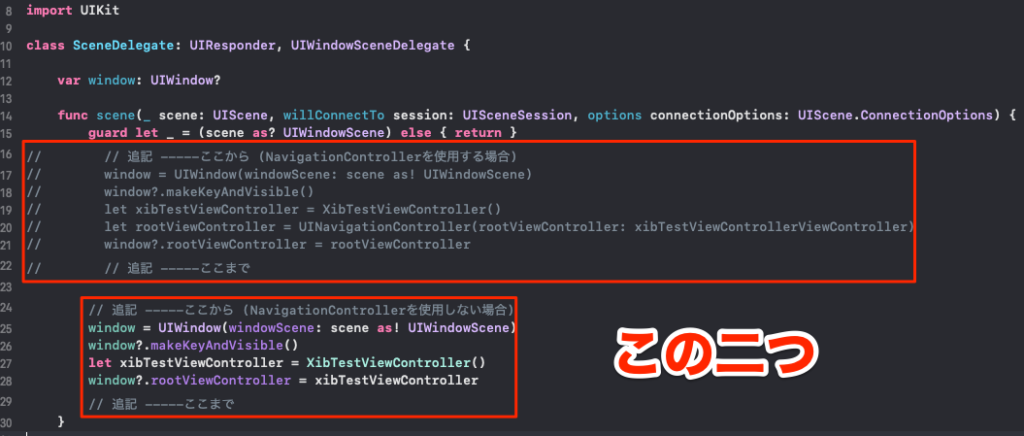
最後にSconeDelegate.swiftにコードを追記して準備は完了です。
import UIKit

class SceneDelegate: UIResponder, UIWindowSceneDelegate {

    var window: UIWindow?

    func scene(_ scene: UIScene, willConnectTo session: UISceneSession, options connectionOptions: UIScene.ConnectionOptions) {
        guard let _ = (scene as? UIWindowScene) else { return }
        // 追記 -----ここから (NavigationControllerを使用する場合)
        window = UIWindow(windowScene: scene as! UIWindowScene)
        window?.makeKeyAndVisible()
        let <#名前#>ViewController = <#ファイル名#>()
        let rootViewController = UINavigationController(rootViewController: <#名前#>ViewController)
        window?.rootViewController = rootViewController
        // 追記 -----ここまで

        // 追記 -----ここから (NavigationControllerを使用しない場合)
        window = UIWindow(windowScene: scene as! UIWindowScene)
        window?.makeKeyAndVisible()
        let <#name#>ViewController = <#FileName#>()
        window?.rootViewController = <#name#>ViewController
        // 追記 -----ここまで
    }

    func sceneDidDisconnect(_ scene: UIScene) {

    }

    func sceneDidBecomeActive(_ scene: UIScene) {

    }

    func sceneWillResignActive(_ scene: UIScene) {

    }

    func sceneWillEnterForeground(_ scene: UIScene) {

    }

    func sceneDidEnterBackground(_ scene: UIScene) {

    }

}
これでビルドも正常に通るようになります、後はStoryboardと同様にLabelやButtonを配置して開発を進められます。
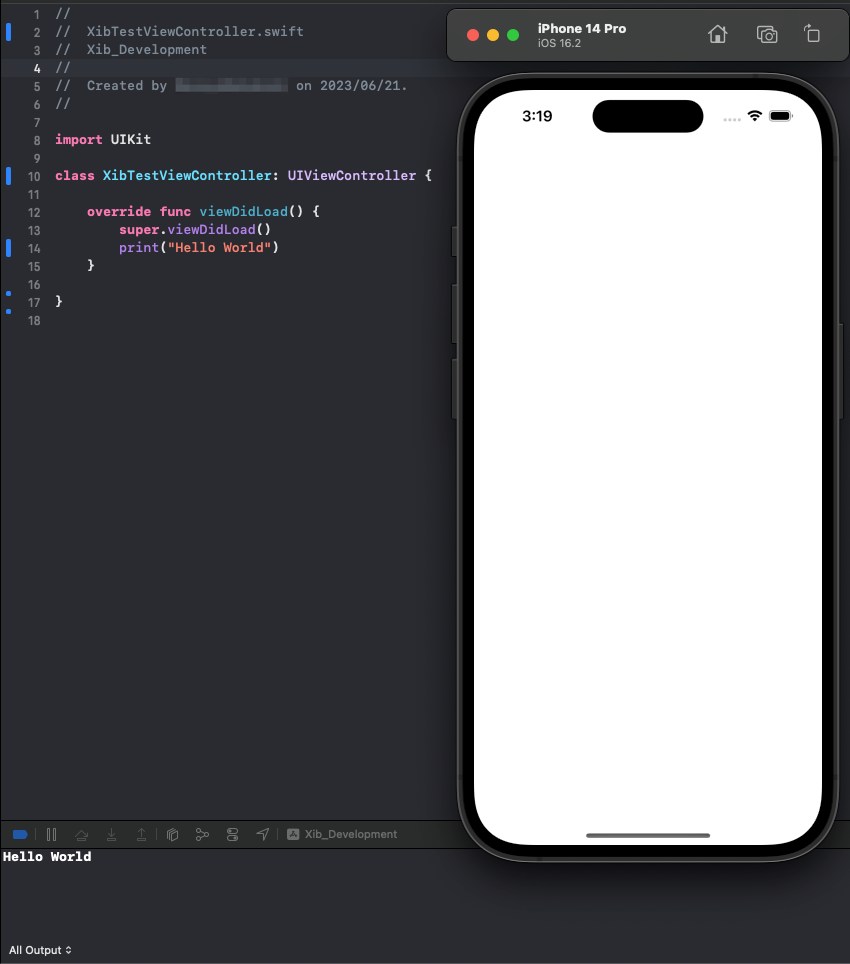

今回は以上です、Xibファイルを使って開発効率を改善することが出来るので色々自分なりの便利技を身につけていきたいですね。
◎今日の格言
ー Albert Einstein

Albert
Try not to become a man of success, but rather become a man of value.
(成功者になろうとするのではなく、価値のある人間になることを目指しなさい)
